

How to install WPC Decorative Panel on a plastic substrate?
Aug 11, 2026
Leave a message
As a seasoned supplier of WPC (Wood-Plastic Composite) Decorative Panels, I've witnessed firsthand the transformative power these panels bring to various spaces. WPC panels offer a unique blend of aesthetics and durability, making them a popular choice for both interior and exterior applications. In this blog post, I'll guide you through the process of installing WPC Decorative Panels on a plastic substrate, ensuring a seamless and long-lasting finish.
Understanding WPC Decorative Panels
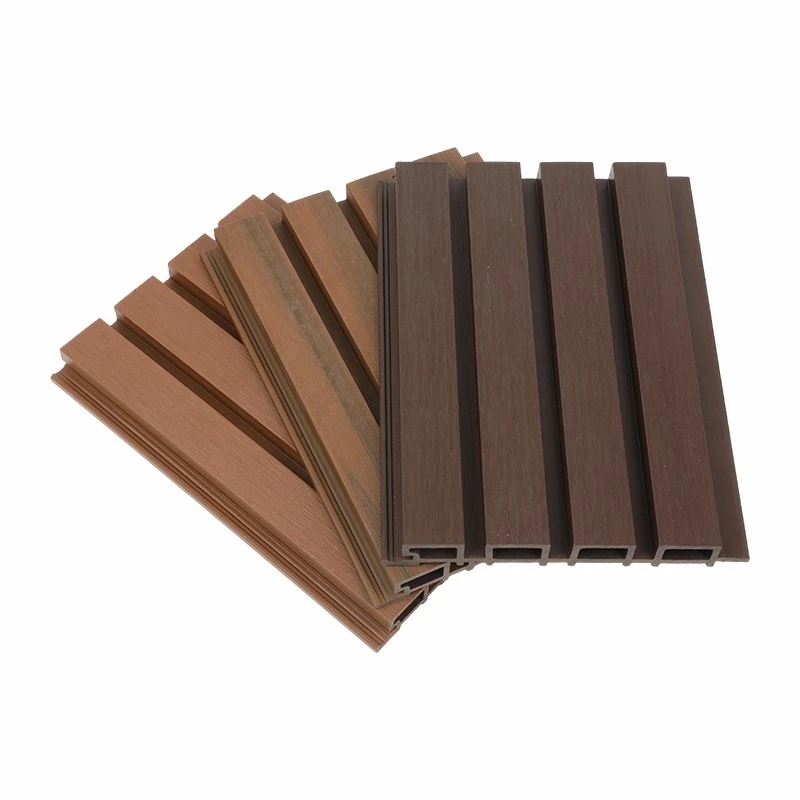
Before we dive into the installation process, let's take a moment to understand what WPC Decorative Panels are. WPC panels are made from a combination of wood fibers and thermoplastics, resulting in a material that mimics the look and feel of natural wood while offering superior resistance to moisture, rot, and pests. These panels come in a wide range of colors, textures, and designs, allowing you to create a customized look for your project.
There are several types of WPC panels available in the market, each suited for different applications. For exterior walls, you might consider WPC Panel for Exterior Walls, which are designed to withstand harsh weather conditions. If you're looking for a more rustic look, WPC Wood Slat Panel can add a touch of warmth and character to your space. And for a modern and sleek appearance, External WPC Cladding is an excellent choice.
Preparing the Plastic Substrate
The first step in installing WPC Decorative Panels on a plastic substrate is to prepare the surface. This involves cleaning the substrate to remove any dirt, dust, or debris that could affect the adhesion of the panels. Use a mild detergent and water to clean the surface, and then rinse it thoroughly with clean water. Allow the substrate to dry completely before proceeding with the installation.
Next, inspect the substrate for any damage or irregularities. If there are any cracks, holes, or uneven areas, repair them using an appropriate filler or patching compound. Sand the repaired areas smooth to ensure a flat and even surface for the panels.
Measuring and Cutting the WPC Panels
Once the substrate is prepared, it's time to measure and cut the WPC panels to fit the dimensions of your project. Use a measuring tape to measure the length and width of the area where the panels will be installed. Add a few extra inches to each measurement to allow for trimming and fitting.
Mark the measurements on the back of the WPC panels using a pencil or a marker. Use a fine-tooth saw or a jigsaw to cut the panels along the marked lines. Make sure to wear safety goggles and gloves when cutting the panels to protect yourself from any flying debris.
Installing the WPC Panels
There are several methods for installing WPC Decorative Panels on a plastic substrate, including adhesive bonding, mechanical fastening, and a combination of both. The method you choose will depend on the type of panel, the substrate, and the specific requirements of your project.
Adhesive Bonding
Adhesive bonding is a popular method for installing WPC panels on a plastic substrate. It provides a strong and durable bond that ensures the panels stay in place for years to come. To use this method, apply a high-quality construction adhesive to the back of the panel using a notched trowel. Make sure to apply the adhesive evenly and cover the entire surface of the panel.
Carefully place the panel onto the substrate, aligning it with the edges and corners of the area. Press the panel firmly onto the substrate to ensure good contact with the adhesive. Use a roller or a block of wood to apply even pressure across the panel and remove any air bubbles.
Repeat the process for each panel, working your way across the area until all the panels are installed. Make sure to leave a small gap between each panel to allow for expansion and contraction due to changes in temperature and humidity.
Mechanical Fastening
Mechanical fastening is another option for installing WPC panels on a plastic substrate. It involves using screws, nails, or clips to secure the panels to the substrate. This method is ideal for areas where the panels may be subject to high winds or other external forces.
To use this method, drill pilot holes into the substrate at regular intervals using a drill bit that is slightly smaller than the diameter of the screws or nails. Place the panel onto the substrate, aligning it with the pilot holes. Insert the screws or nails through the holes in the panel and into the substrate, and tighten them securely using a screwdriver or a hammer.
Alternatively, you can use special clips or brackets designed for WPC panel installation. These clips are typically installed on the edges of the panels and then snapped onto the substrate, providing a quick and easy way to secure the panels in place.
Combination Method
In some cases, a combination of adhesive bonding and mechanical fastening may be the best approach. This method provides the strength and durability of mechanical fastening, as well as the added security of adhesive bonding.
To use this method, apply a thin layer of adhesive to the back of the panel as described above. Then, use screws or clips to secure the panel to the substrate at regular intervals. This will help to ensure that the panel stays in place even if the adhesive fails.

Finishing Touches
Once all the WPC panels are installed, it's time to add the finishing touches to your project. Use a trim piece or a molding to cover the edges of the panels and give the installation a professional look. You can choose a trim piece that matches the color and style of the panels for a cohesive appearance.
Seal the joints between the panels using a silicone caulk or a sealant to prevent water and moisture from seeping in. This will help to protect the panels and the substrate from damage and ensure the longevity of your installation.
Maintenance and Care
WPC Decorative Panels are relatively low-maintenance and easy to care for. To keep your panels looking their best, simply clean them regularly with a mild detergent and water. Avoid using abrasive cleaners or tools that could scratch or damage the surface of the panels.
Inspect the panels periodically for any signs of damage or wear. If you notice any cracks, chips, or other issues, repair them as soon as possible to prevent further damage.
Conclusion
Installing WPC Decorative Panels on a plastic substrate is a straightforward process that can be completed by anyone with basic DIY skills. By following the steps outlined in this blog post, you can ensure a successful installation that will enhance the beauty and functionality of your space for years to come.
If you're interested in purchasing WPC Decorative Panels for your next project, please don't hesitate to contact us. We offer a wide range of high-quality WPC panels in various colors, textures, and designs to suit your specific needs and preferences. Our team of experts is always available to provide you with professional advice and guidance to help you make the right choice for your project.
Let's work together to transform your space with the beauty and durability of WPC Decorative Panels!
References
- "WPC Panel Installation Guide," [Manufacturer's Name], [Year of Publication]
- "Plastic Substrate Preparation for WPC Panel Installation," [Industry Publication], [Year of Publication]
- "Best Practices for Adhesive Bonding of WPC Panels," [Research Report], [Year of Publication]